261 Broad Street
Windsor, CT 06095
(860) 285-0172
support@invisiblegold.com
Your Website Should Be Easy to Edit
Windsor, CT 06095
(860) 285-0172
support@invisiblegold.com
Your Website Should Be Easy to Edit
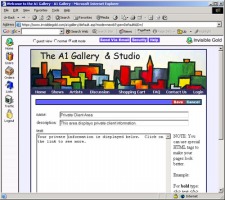
Private Client Areas
This tutorial will follow steps to create a private client area for a gallery owner. We'll create a page, login accounts for each user and assign rights so regular website visitors don't see the link. |
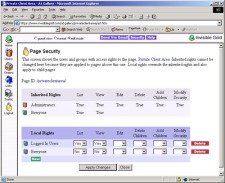
2. Hide The Page
Click "New" Under the Local Rights section. On the next page, click on "Everyone" to give the page its own "Everyone" settings and it will be added to the list. Change "List" and "View" rights both to "No" and click "Apply Changes". Regular website visitors can no longer see the page. Next, click "New" again and add "Logged In Users" to the list. Set "View" and "Edit" rights to "Yes" and "Yes". Click "Apply Changes" and then "Close". Now the page is visible to users who enter a valid login and password. |
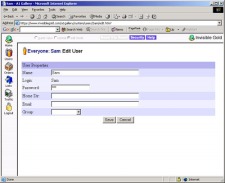
3. Create User Accounts
|
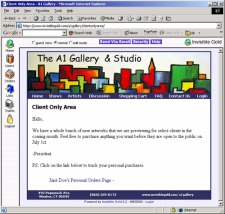
4. Create Client Pages
Now, if you visit the page as an Administrator, you see a list of client pages. If you login as a client, you only see a link to your private page. Be sure to login as each user to check your work and see how the page will appear to them. As a last step, email the login information to each client with instructions on how to visit their page. Your private client area is complete. |
| Advanced Tip - Home Directory The user's "Home Dir" field determines what page they start on when they log in. We can set it so that each client automatically jumps to their private page. We need to note the address for the page we want to jump to. For example: navigate to the private client area page. Note the address is something like: https://www.invisiblegold.com/private/. We would set home dir to "/private/". |
| Advanced Tip - Show The Link Another nice technique is to set the rights to the Private Client Area page so "Everyone" has "List" but not "View". This means that a regular website visitor will see the link to the Client Area section, but when they click on it, they will see a login page first. |
| Advanced Tip - Use Groups You can use groups to assign rights to more than one user at a time. For example, we did all of our editing as an Administrator. Any member of the Administrator's group has the same rights. We could create a different group such as "Clients" with rights to view a collection of pages. |
| Advanced Tip - Give Users Edit Rights As a final tip, note that you can also assign "Edit" rights so a client can edit their own page. This is useful for more collaborative situations. Different page templates allow you to create private discussion areas, lists of files to download, calendars and more. |
See Also:
| Online Documentation Home, Invisible Gold Quick Tour, Template Library, Users and Groups, Shopping Cart, Mailing Lists, Uploading Images, Traffic, Approvals, Banner Ads, Login/Logout, Email Newsletters, Advanced Button, Moving Pages, System View, Security, System Settings, Hosting Invisible Gold Powered Websites, Generate a PayPal Client ID, Terms, Useful HTML Guide, Private Client Areas |
Keywords:
| Users, Groups, Security, Login, Registration |
Invisible Gold, LLC was founded in 2001 as a web design and internet software company. The owner, John Waiveris, wanted to enable people to manage their own websites. John is active in the Windsor community and the Invisible Gold website software is used daily by 600 businesses.
Latest News
- Website Performance TestingTwo tools for testing website speed
- Meta Tags vs. Keywords: Your Site's Visibility
- Don't Get Tricked By "Domain Registry of America"The Domain Registry of America has recently sent out a countless number of letters and emails in a campaign to get you to switch to their domain registry service by using language that suggests that your domain will expire, and that in order to prevent losing it, you must register with their company. The email is disingenuous at best and fraud at its worst.
Contact Us
Windsor, CT 06095
(860) 285-0172
support@invisiblegold.com
Your Website Should Be Easy to Edit
2026 © All Rights Reserved. Terms of Service