261 Broad Street
Windsor, CT 06095
(860) 285-0172
support@invisiblegold.com
Your Website Should Be Easy to Edit
Windsor, CT 06095
(860) 285-0172
support@invisiblegold.com
Your Website Should Be Easy to Edit
Create a New Invisible Gold powered site by hand.
Note: Even before you can create the site, you need a Windows 2000 or 2003 Server that can run ASP and a version of Invisible Gold installed on it. |
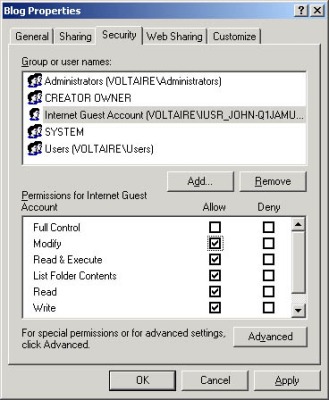
Step 2: Set Directory Security
Highlight the directory \Data, and use the right mouse button to select properties. Change to the security tab, and then click ADD. The web process user is usually IUSR_Machinename (where machinename is your machine). However, it's easiest to click ADVANCED, and then FIND NOW. The IUSR account should be listed below. Highlight the IUSR account, and click OK, and OK again. You should now see a window similar to the picture on the right. Highlight the IUSR account and set MODIFY to Allow (check the box). The account should now have the ability to make changes to files in the \DATA directory. |
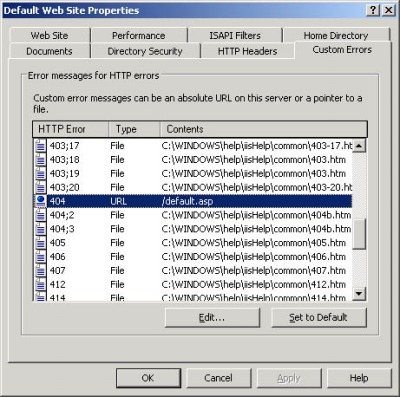
Step 3: Create the IIS Website
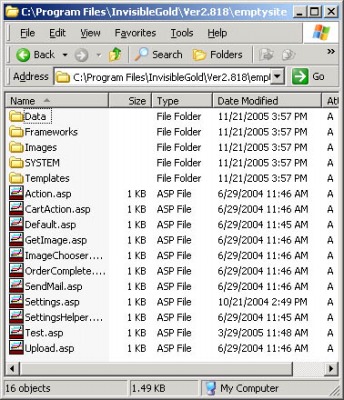
There are several steps to create a new site or virtual directory. It's beyond the scope of this document to explain them. However, just keep in mind that it is really no different than setting up any other type of website on a Windows Server. You need to use the following settings: 1) Make sure the home directory points to the directory we just created. (The one ABOVE the Data directory. The one that contains the file settings.asp and default.asp) 2) Make sure you create a 404 Handler that points to the URL /default.asp (or if you are creating a Virtual Directory, /vdir/default.asp, where vdir is the vdirectory path) 3) Make sure the site has execute script rights. It doesn't need to run executables (which would comprimise security). However, it does need the ability to run scripts. 4) You may want to verify that the security tab uses the IUSR_machinename account that you specified up above. Careful system administrators create a separate user account for each site to minimize cross site vulnerabilities. 5) You can also setup an SSL at this point. Again, this is beyond the scope of this document. An SSL will allow the site to run in secure mode. 6) You should also configure the host headers at this point. It's a good idea to use host header sharing. This means that you point the DNS for an individual site to an IP address on this server. Then, you put the domain names into the host headers list. This is how IIS knows to load this website when a user accesses it with the domain name. For websites, it's also a good idea to setup a temporary "development" site in the list. For example: newsite.invisiblegold.com along with newsite.com and www.newsite.com. (This is assuming that invisiblegold.com is pointing to an IP on this machine.) |
| Step 4: Edit the Settings.asp file There are four important values. The domain should be the domain for the site. If you are using a temporary development site, it can be something like newsite.invisiblegold.com. (note: it doesn't include the http://) Second, you want to paste in a license key. Visit www.invisiblegold.com/licenses for more information. You can use a temporary demo license to get the site working. Just be careful to replace it before the site goes live. If the site is in a virtual directory, make sure to put it here. Finally, if the site has an SSL installed, you can set HTTPS mode to true. Keep in mind, it's usually a good idea to test the site out first. Make sure it works, and then change the http:// to https://. If it works, then you can turn secure mode on. When you are done, it should look like the image to the right. If images aren't coming up or links aren't working, then double check the 404 handler and the settings.asp file. |
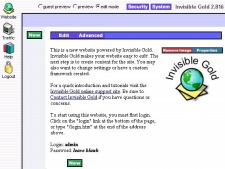
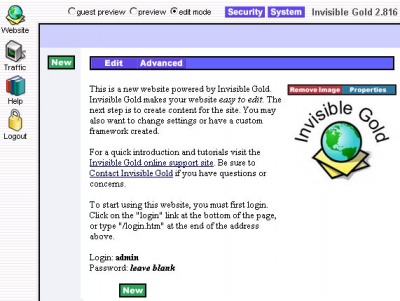
Step 5: Log in
The default login is: Admin with no password. You should be logged in. (A row of buttons should show up to the left and top.) Note: If there is a problem at this point, try running the test page. You can acces this by going to www.websitename.com/test.asp. (where websitename is your new website.) Keep in mind, this will only detect problems in the Invisible Gold installation. |
See Also:
| Online Documentation Home, Invisible Gold Quick Tour, Template Library, Users and Groups, Shopping Cart, Mailing Lists, Uploading Images, Traffic, Approvals, Banner Ads, Login/Logout, Email Newsletters, Advanced Button, Moving Pages, System View, Security, System Settings, Hosting Invisible Gold Powered Websites, Generate a PayPal Client ID, Terms, Useful HTML Guide, Private Client Areas |
Keywords:
| Hosting, Authoring |
Invisible Gold, LLC was founded in 2001 as a web design and internet software company. The owner, John Waiveris, wanted to enable people to manage their own websites. John is active in the Windsor community and the Invisible Gold website software is used daily by 600 businesses.
Latest News
- Website Performance TestingTwo tools for testing website speed
- Meta Tags vs. Keywords: Your Site's Visibility
- Don't Get Tricked By "Domain Registry of America"The Domain Registry of America has recently sent out a countless number of letters and emails in a campaign to get you to switch to their domain registry service by using language that suggests that your domain will expire, and that in order to prevent losing it, you must register with their company. The email is disingenuous at best and fraud at its worst.
Contact Us
Windsor, CT 06095
(860) 285-0172
support@invisiblegold.com
Your Website Should Be Easy to Edit
2026 © All Rights Reserved. Terms of Service